What is Standard Dressage Arena Layout | Performance Footing
If you want to set up a dressage arena, it is crucial to understand the standard dressage arena layout and process of setting up. Check below to know more!
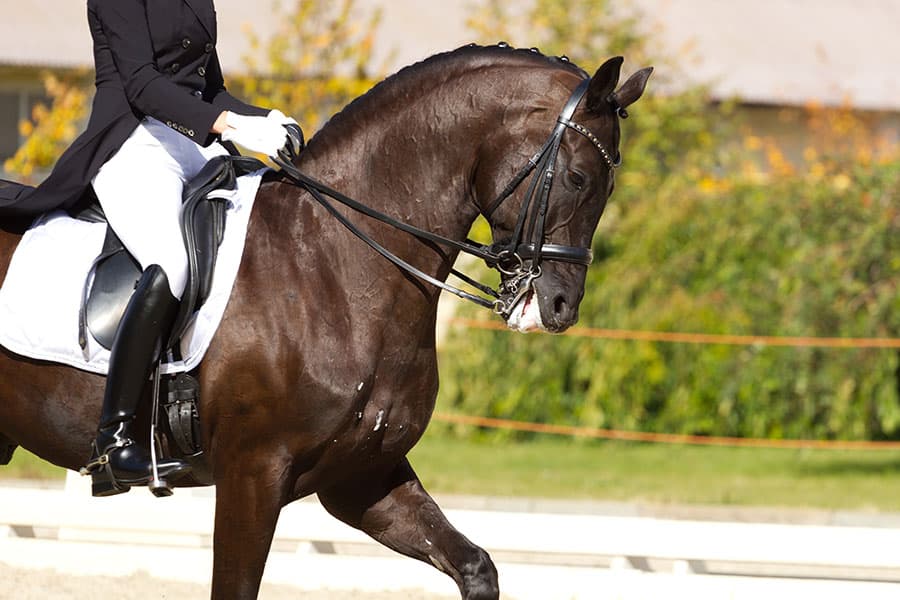
Understanding the standard dressage arena layout is essential for being prepared to perform at dressage competitions with your horse. Practicing in a dressage arena for dressage tests is even more crucial for receiving high marks. If you want to set up a dressage arena, it is a simple process that does not require heavy equipment. Let’s look at the dressage arena sizing, diagrams, and setup.
Dressage Arena Layout and Size
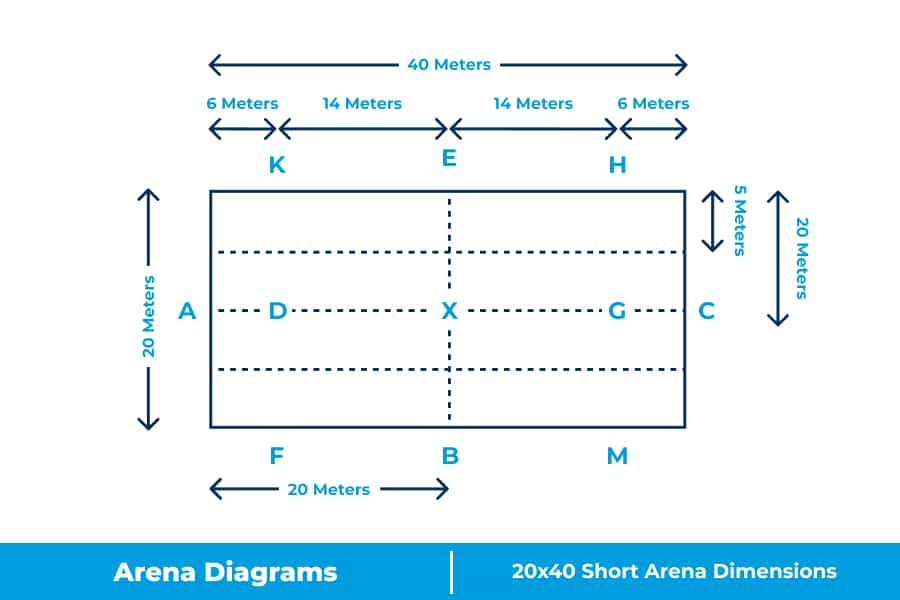
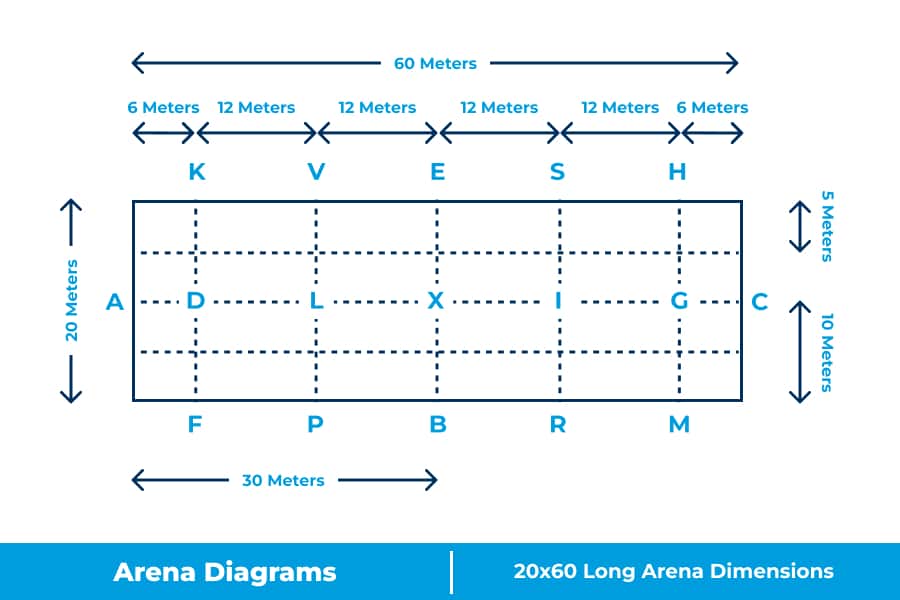
You have two size options when setting up your arena. One is a small dressage arena measured at 20 meters x 40 meters. The other is larger at 20 meters x 60 meters.
The size of an arena during a dressage competition can vary, with the larger arena being more common. Review the two diagrams below for the proper layout and spacing of arena letters.
Dressage Arena Setup
Gather the necessary supplies and follow the setup guide, both outlined below:
Necessary Supplies
Make sure you have the following supplies gathered and on hand for the setup process to be as easy and efficient as possible.
- Stakes for marking the corners. You will need four total.
- Arena fencing for the outline of your layout.
- Dressage arena letters
- Depending on the size arena you are setting up, you will need two measuring tapes that are either 40 or 60 meters.
- Two measuring tapes that are 20 meters each.
- Visual diagram of whichever arena you are assembling.
Because setup is simple, you should be able to complete the next step on your own. However, having someone ready to assist will help make the process faster.
Setup Guide
Now that you have your supplies (and maybe a helper) together, it is time to set up your dressage arena. Follow the steps below:
1. Pick the Location
When choosing a location for your dressage arena, ensure that you account for the size needed for your layout. Then, walk the area to confirm that you have chosen an area without holes or tripping hazards for your horse. You also need to ensure the site has good drainage and will not end up with puddling after rainstorms. Taking care when picking the location helps ensure the safety of both horses and riders.
Be sure to allow for spacing outside of the arena for competitors and a judge’s box if you intend to hold competitions at your arena.
2. Establish the Corners of the Arena
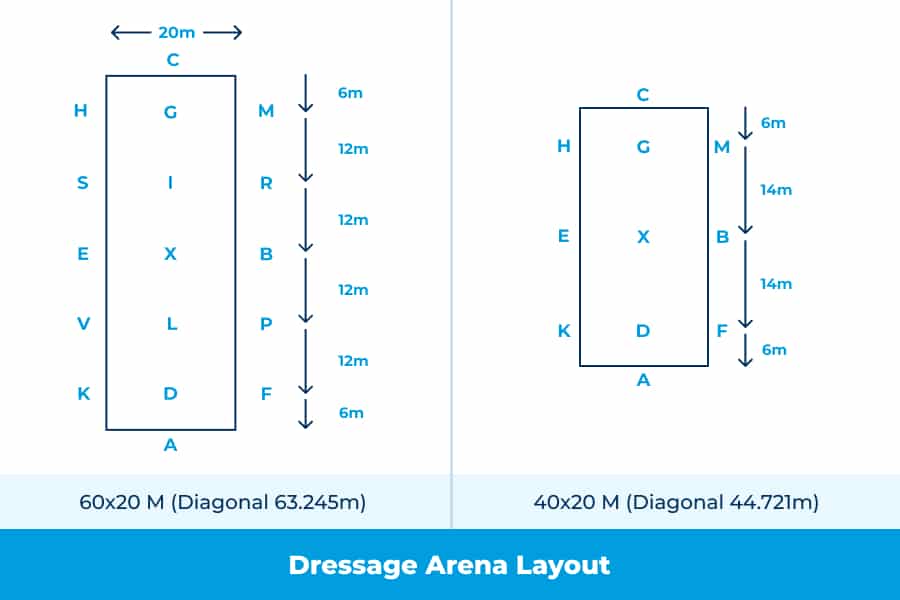
Before you begin, make sure you have your diagram in hand, as this will be crucial for following this step.
The first stake should be placed at the corner between the letters “C” and “M”.
The second stake should be placed at the corner between the letters “C” and “H”, 20 meters from the first stake.
The third stake should be placed at the corner between “A” and “F”, either 40 or 60 meters from the first stake (depending on the arena size).
The fourth stake should be placed between the letters “A” and “K”, the meeting point of 20 meters from your third stake and 40 or 60 meters from your second stake.
*Make sure the corners are set at 90-degree angles.
3. Place the Arena Fencing and Letters
The final step is to place the fencing between the stakes and set up the arena letters. The letters require specific spacing and placement. Refer to the diagrams above for this last step.
Footing Solutions for Better Performance
This article provided instructions for the easy setup of a dressage arena on existing ground. If you want to establish a more permanent arena, Performance Footing offers products that enhance performance and provide a complete solution for establishing and maintaining your arena.
Get in touch with us today to discover how we can provide solutions for your dressage arena needs!